Pages

All about box camera photography with a special emphasis on Ensign Ful-Vue cameras.

Saturday 15 May 2021

Shooting the Balda Baldixette

 I've mentioned this lovely camera a few times on this blog but haven't yet shared
any photos taken with it, so today's the day to share some of its snapshots. 

A little background about the camera. Well, it has a fancy (for a box camera) 72mm 2-element lens and a choice of two apertures, f/9 and f.16. It shoots at 1/60, focuses down to 5 feet, and dates from around 1956. It shoots 6x6 squares and has the most laughable, impractically small viewfinder. To make composition easier I bought an accessory viewfinder that slips into the accessory shoe on top.

 These were all taken on Lomography 400 film. 


Well, I think it's safe to say these are some of the nicest and sharpest colour shots I've taken on a box camera. The Baldixette is certainly worth the few quid they go for on eBay if you are looking for an eye-level box camera. That said, the tiny viewfinder can be challenging, so it may be worth investing in an accessory viewfinder like I did.


Monday 26 April 2021

Another Eye-Level Box Camera: Kodak Brownie Cresta III

 I had a recent trip to Inverness and took with me another box camera, just in case there was anything nice to shoot while I was there.

After my failure with the Agfa Clack I decided to give another camera a go that is also shot at eye-level, a Kodak Brownie Cresta III. This plastic wonder may not look like much but it has one of the most reliable shutter mechanisms in my whole collection and its plastic Dakon lens gives lovely results. 

It dates from the first half of the 1960s and has a choice of two apertures, f/11 and f/16 (though these are labelled EV12 and EV13). It also has a close up lens that pulls into place with the lever on the side which allows you to focus as close as 4 feet. Its single shutter speed of 1/40 puts it on a par with the plastic Ensign Fulvueflex, another camera that many might dismiss as a toy but actually gives rather nice results.

As it happens, the weather was rather nice in Inverness and my husband and I had a hour before we had to move on, so we decided to take a walk along the Caledonian Canal. I am very happy to say that my pictures came out a lot sharper on the Brownie than they did on the Agfa, and most of the roll had some nice pictures on it.

One interesting thing did crop up, though. Apparently, at some point during lockdown, I loaded this camera in the vague hope of getting some nice shots near my home. I guess the conditions weren't great and I only managed to get 4 shots, after which I shelved the camera and awaited better conditions. I guess they were a long time coming because I couldn't remember for the life of me when I loaded the camera, or what film it was loaded with when it came to our Inverness outing. Peering through the film window revealed rounded numbers, which were a tell tale sign of Catlabs X Fiilm 80, a film I am very fond of. Now, either because the camera had been shelved for so long or because the film unravelled a little on loading, the first couple of shots had light leak. It probably happened during loading as I took the same shot of a sand castle three times, so I must have suspected the first frames wouldn't come out. The third shot was mostly unscathed and is pictured here:

Sand Castle

That's a surprising amount of detail in the sand from a plastic lens. 

Anyway, as I couldn't remember what the first 3 frames were, or the conditions in which they were taken, we decided to semi-stand develop the film, a process I will explain in more detail in the next post. For now, it will do to say that the film responded very well to this approach and we got some nice snaps.

Old Tractor Factory

Boats on the Caledonian Canal

More Boats on the Caledonian Canal

Swans

Bell Tower

Caledonian Canal

Wait For Me, Dad

Clachnaharry Railway

Railway Cottages

So we've ended up with some pretty vintage looking shots. I think C. T. Goode would have been very proud of my Clachnaharry Railway shot!

 I don't know how long the film sat in the camera but the sky shows some imprinting of the film backing paper on the image in many of the shots. I've had this happen before when a camera has sat loaded but unused for some time, so it's best to avoid that if possible. It hasn't ruined the shots though. Shall we just claim it adds character?

The Cresta III is a lovely camera. Highly recommended. A great box camera for beginners that's easy to use and doesn't involve any tricky waist level composing. British made Brownies are also good choices as they tend to take 120 film. Lots of other Brownie models take 127 film which is harder to come by and expensive.

Monday 19 April 2021

Eye Level Box Camera: The Agfa Clack

Not all box cameras are shot at waist level. Some nice models are shot at eye level.
I have a couple in my collection and on the arrival of the recent lambing snows in my part of the world I thought it'd be nice to go out, play in the snow a bit and take some snaps with one of these machines. 

I'm pretty comfortable shooting at waist level now. I can usually do it without camera shake. Depending on the model of camera, and the size of its viewfinders I can more or less get a straight horizon too, though this is challenging on some, cough cough Junior Box Ensign

The eye level shooter I chose today was an Agfa Clack,which is a really lovely model with bells and whistles such as a swing in place close up lens with built in yellow filter, and two apertures, f/11 and f/12.5! It shoots eight 6x9 frames and has a 95mm meniscus lens. It's solidly made and feels nice to handle. In the right pair of hands it takes great shots.

Mine were not the right pair of hands today. I thought I was managing to keep the camera steady but the image blur shows I failed. The only image that was crisp, the last one, was also the only image I took in portrait instead of landscape. This suggests to me that my method of holding the camera up and pressing the shutter release with my right thumb was the problem, as when I held the camera differently for that one shot it remained steady. 

I can hardly review the camera with these shots. It would be grossly unfair. As the final, sharp shot demonstrates, the lens has some decent resolving power so I will have to learn from my mistakes and take this camera out again. It was still fun being out and about with a box camera, and I hope with time I'll get the hang of this one. 

I was shooting Catlabs X Film 80, pulled a stop to ISO 40 as the snowy conditions were so bright. The pictures are ordered from worst to best.

1) House and Boat
 

2) Fence Posts

 
3) Drunk Gate

4) Impressionist Power Poles


5) School Football Pitch


6) Road


7) House Under Clouds


8) Stream
 

So some of those pictures will probably give you a headache if you stare at them too long. Others are blurry though I don't mind the results. I actually quite like the slightly impressionist vibes I get from the shot of the power poles, and I find the mild soft focus of the road shot quite pleasing. The image has a nice mood. I was very happy with the stream shot though. I think it gives a tantalising taste of what this camera can do. Let's hope I do better next time.

Monday 12 April 2021

Testing the Halina 6-4

Well, it's safe to say that I haven't exactly been itching to go out with the box cameras during the Covid 19 pandemic. The travel restrictions meant that I'd have to shoot the same few miles around my home again and again which gets dull fast. The abysmal Winter weather didn't exactly lend itself to good box camera photography either, so many months have passed where all I've really done is keep the cameras dusted and wait for happier times.

The restrictions haven't lifted yet, but some of my as yet untested cameras have been staring me in the face, longing to be loaded and used again for the first time in who knows how long. This weekend I couldn't stand it any more, so I planned a brief excursion just a few minutes from home where hopefully there would be some nice seascapes and maybe some of the local livestock would be obliging and pose for some snaps. 

The camera of choice was a Halina 6-4, which, on the one hand is quite a swish box camera in that it has three apertures to choose from, double exposure interlock prevention, and shoots dual format, either 6x6 or 4x4. On the other hand the build quality is shocking, looking as though it was assembled as cheaply and quickly as possible. The edges are rough and the joins aren't exactly flush (particularly when you try and sit the 4x4 mask in place, it wobbles a bit, at least on my model), and you shudder as you place the film back on after loading because you strongly suspect it won't keep the film light tight. So, not exactly a precision model.

However, there is something about Halina cameras that make them an absolute joy to shoot. One of my favourite 35mm cameras is my Halina Paulette Electric. It wasn't exactly assembled with any love or care either but the experience of using it just puts a smile on your face. Maybe it's the knowledge that the camera isn't a laboratory standard precision instrument that needs treating with reverence and ceremony every time you raise it to your eye. Shooting the Halina feels so laid back and easy that you don't really think about buttons and dials and just think about the composition. One final point worth making is that while the camera bodies aren't exactly oozing quality, Halina did put good lenses in them, and the lenses are far more important. What this means is the cameras still take good pictures, and this is precisely what I found with the Halina 6-4. 

My husband gave the camera a quick dab of oil to get the focus ring moving as it should again and once we were satisfied the shutter was behaving itself I loaded it with some Catlabs X Film 80 and then we got togged up to go out. It may be late March but it was freezing outside and blowing a gale. Not exactly great shooting conditions but this was the afternoon I had scheduled for it, so out we went. 

There were a few challenges keeping the camera still in the wind. I typically just had to find somewhere sheltered or get low to the ground or wedge myself against some of the rock faces. I used the 4x4 mask to get 16 test shots and then we made our way home to huddle in front of the fire with a warm drink.

Predictably, the lighting conditions outside weren't favourable for the film's box speed, so we pushed the film in development to ISO 125. The camera had a fixed shutter speed of 1/50 and the widest aperture available (used in every shot) was f/8. We developed the film in HC110(B) for 11 minutes and 28 seconds, giving inversions every 45 seconds. 

Here are the results (well the good ones where the wind didn't move me and the camera).

Testing the portrait zone (5-10 feet)

Lockdown Fur

Testing the scenes zone (25 feet to infinity)

Hubby scrambling over the rocks.

I liked the swirl patterns in this rock face.

Wondering how much detail in the wood the lens would capture.

Rusty Old Submarine. Okay, it's actually a rusty old silo. One of my favourite test shots, again seeing how much detail the lens would capture.

Rocks and Waves. Another generic view testing the scene zone.

Some obliging cows smiling for the camera. By this stage I was freezing and just wanted a cuppa.
 

All in all, not bad. First surprise, the film back didn't allow any light leaks. As for the two-element lens, it performed quite well, especially in the portrait zone. The car tyre, old wooden stile, and submarine shot all have a lot of detail in them. I was super happy with the submarine shot. There was an impressive amount of detail in the metal and rivets, and the highlights on the grass were gorgeous. The scene shots were perfectly serviceable. The resolving power of the lens isn't amazing, so these 4x4 negatives won't enlarge all that successfully. Would they make nice contact prints? Yes. Bearing that in mind, would I shoot 6x6 next time? Probably. 

I will definitely take the Halina 6-4 on another outing. Shooting in a gale in overcast conditions wasn't exactly giving it a fair fight, but even so it performed respectably. I haven't tried the smaller apertures yet, so the sharpness may well improve when shooting scenes at f/11 or f/16.

Another fun Halina camera and one I can recommend if you want a box camera with a little more choice when it comes to apertures. If you are considering this camera because you like the idea of shooting 4x4 just make sure you ask the seller if the mask is included. It detaches from the camera and is easily lost.


Monday 5 April 2021

Box or Folder? Which is Better for Beginners?

As my vintage camera collection grows, this is a question that keeps cropping up in my mind. For the most part, folding cameras were more advanced models than box cameras, with better lenses, more shutter speeds, and typically a higher price. However, that is not always the case. Some folders offer little more by way of functionality than the box cameras, which makes me wonder what the thought process was when choosing one or the other back in the 1950s or earlier. 

Here is a good example:


As we can see from this advert for the All Distance Ensign and the Pocket Model No. 1, there really isn't much to distinguish these cameras. Both offer a single, instantaneous shutter speed, both allow time exposures, both have direct vision and reflex view finders, and both cameras come in red, blue, or brown. The only real difference is the price (25/- versus 37/6). Now the folding camera is obviously the more compact. The clue is in the name "folding" camera. In fact this model it is marketed as a camera for your pocket. One might suspect it has a better lens, but this is just another single element "all-distance" lens, with preset "portrait" or "view" mount positions.

So, is it a case of convenience only? Is it worth the extra cash just to have a camera that will fit in your pocket? Or is it a status thing? Do you buy the folder just because it looks like a more expensive camera?

There may be something in that theory. An early Ensign camera catalogue includes a review of the Ful-Vue (early model), which states:

Finally, it has the appearance of a very expensive camera, although one can buy it for a modest 25/-.

Nevertheless, in the same catalogue, a description of the Ensign Pocket E-20 Camera states:

Many beginners escape the box camera stage entirely and commence with a folding model.  The convenience with which  this type of camera can be carried compared with the 'box' needs no emphasis.

No better folding camera for a beginner is to be found in any maker's catalogue than the Ensign Pocket E-20....its graceful tapering ends and slim body enable it to be easily carried in almost any normal pocket.

A particular feature... is the hinged back, a feature until recently only found on the more expensive types of camera. 

In terms of functionality and creative scope the Pocket E-20 cannot outdo the cheaper box cameras, so it isn't much of a progression for beginners to exchange their boxes for this. The description does indeed seem to claim that the convenient size and the appearance of a more expensive camera are the main selling points of this camera.

Were the beginners to fork out for Pocket E-20 Model 2, on the other hand, that would be quite the upgrade. They would get an Ensar f/7.7 anastigmat lens with front cell focusing  and two instantaneous shutter speeds of 1/25 and 1/75. The model 1 cost 27/6. This upgraded model 2 cost £2-5-0.

What about other models, such as the Selfix Snapper? The entry camera into the impressive Selfix folding range.

Advert in PhotoGuide Magazine, Vol. 5, No.6 (1954)

Well, if you read the advert you'll see this camera is barely more capable than the Ful-Vue Super, released the same year. Both had a three point focusing lens that would focus from 2 yards to infinity. They have a single instantaneous shutter speed, are both synchronised for flash, and both take 620 film. The only way that the Snapper is an upgrade on the Super is because it offers 2 apertures instead of just one. However, given that in 1955, The Chemist and Druggist magazine listed the Super's retail price as 59/8, you'd have to really want that extra aperture to pay £5.10.8 for the Snapper instead.

All I will say is the Snapper was a fine looking camera, and maybe that was part of what you were paying for.


So, for absolute beginners it seems to come down to aesthetics (my camera looks pretty), bragging rights (my camera looks expensive), and ease of carrying (my camera fits in my plus fours). If you had a little more cash at your disposal, the folders could offer nicer lenses and a few more apertures and shutter speeds. That said, not all box cameras were created equal. Some, such as the Balda Baldixette c.1956 had 2-element lenses and 2 apertures. The Halina 6-4, c.1961, had a 2-element lens, shot dual format, and had 3 apertures. So at the beginner level it  really is swings and roundabouts. The folders don't outclass the boxes until we get to the improver models such as the Ensign Pocket E-20 Model 2, the Ensign Ranger II, or the Franka Bonafix. 

Ultimately, what it really comes down to is the final print. The better the resolving power of the lens, the larger you can enlarge your prints. For those folders and box cameras that are roughly equivalent, with 'all distance' lenses, you probably wouldn't expect anything more than contact prints. If you could afford a Kodak Sterling II with its 4-element Tessar-type lens then you will be able to blow up the prints a good deal. If you're just starting out the cheaper boxes will do nicely.

A child with a folding camera, pictured in The Home Photographer and Snapshots Magazine, October 1933.


Monday 29 March 2021

Helpful Hints for Photographers from Ensign, Kodak & Coronet


The following was written on a coupon for a free booklet about Ensign Cameras.

HELPFUL HINTS for Photographers.

Sunshine makes all the difference to a photograph. It lights up the shadows, puts in contrasts, and makes the pictures thoroughly pleasing.

Therefore: Take your "Snapshots" when the sun is actually shining, or only lightly covered by clouds.

Don't attempt to make "Snapshots" in Winter or on dull evenings at any time. Make a "Time" exposure instead.

Always hold the Camera very still during exposure.

Don't have the sun dead in front of you - preferably it should be to one side or the other, or behind. 

When making a "Time" exposure rest the Camera on some suitable support, such as a table and hold the Camera quite still.

Try and arrange your subjects in front of a pleasant background.

Don't forget to wind your film to the next number after making an exposure.  

Sunday 21 March 2021

Toggling Your Box Camera's ISO

Note: May not be a box camera.
 

I get it. 1 aperture and 1 shutter speed. Kind of limiting, I know. While it's definitely worthwhile getting familiar with the various EVs your box camera can shoot in without adjustments, it is undeniable that having a workaround for when the light doesn't suit your settings is a big plus. It makes the camera more versatile, increases your creative options, and removes a lot of the frustration:

 "If only I could take that shot, but it's just too bright!"

Well the good news is there are some tools and techniques that can help, so never again do you need to curse yourself for bringing your beloved box camera instead of your SLR.

Too Much Light

Box cameras have slow shutter speeds. Laughably slow by modern standards. Most people these days don't entertain shooting handheld at 1/30th of a second, or at least not without lenses with image stabilisation or cameras with vibration reduction. Lacking these features on our box cameras we have to resort to things like exhaling after the shot has been taken, or placing the camera on a flat surface. This works for the most part, but the slow shutter speed can cause headaches when there is a lot of light. Simply, they may cause the image to be overexposed. 

If my camera is loaded with ISO 200 film and I am shooting in very bright conditions, my pictures will be overexposed by maybe one or two stops. We can solve this "in camera" (as opposed to when we process the film), with the addition of a neutral density filter. 

If you're not familiar with neutral density filters, put simply they reduce the amount of light entering the lens, without a colour bias (at least the good ones). They come in various strengths, so depending on the one you use could reduce the light by 1 to 10 stops (and further if you have the bank balance of an oil tycoon). These have many creative purposes, such as allowing the deliberate use of slow shutter speeds to capture motion blur, (think dreamy waterfall shots), or allowing a wide open aperture to produce more shallow depth of field.

For our immediate purposes, we just want our shot to expose correctly. So if our light meter determines that we risk an image being 1 stop over exposed, we can place an ND2 filter in front of the lens and then take the shot as normal. If we risk 2 stops of over exposure, we do the same with an ND4 filter. If 3 stops, we use an ND8 filter. Simple. 

Too Little Light

I have a box camera loaded with Ilford Pan F 50 (or worse, Rollei RPX 25) and when I get to my location it has turned overcast, typical. This, and other low speed films like lots of light. So finding myself in lighting conditions such as EV12 or EV11, suddenly my famously slow shutter isn't slow enough thanks to the fixed f/11 aperture. Now, this workaround won't be appropriate for all subject matter, especially if it's moving, but the simple answer to this is to secure the camera so it is absolutely still and then take the shot more than once. Each click of the shutter lets in more light.

Take the photo twice to add one stop of light. Take it four times to add 2 stops of light. Eight times to add 3 stops of light etc.

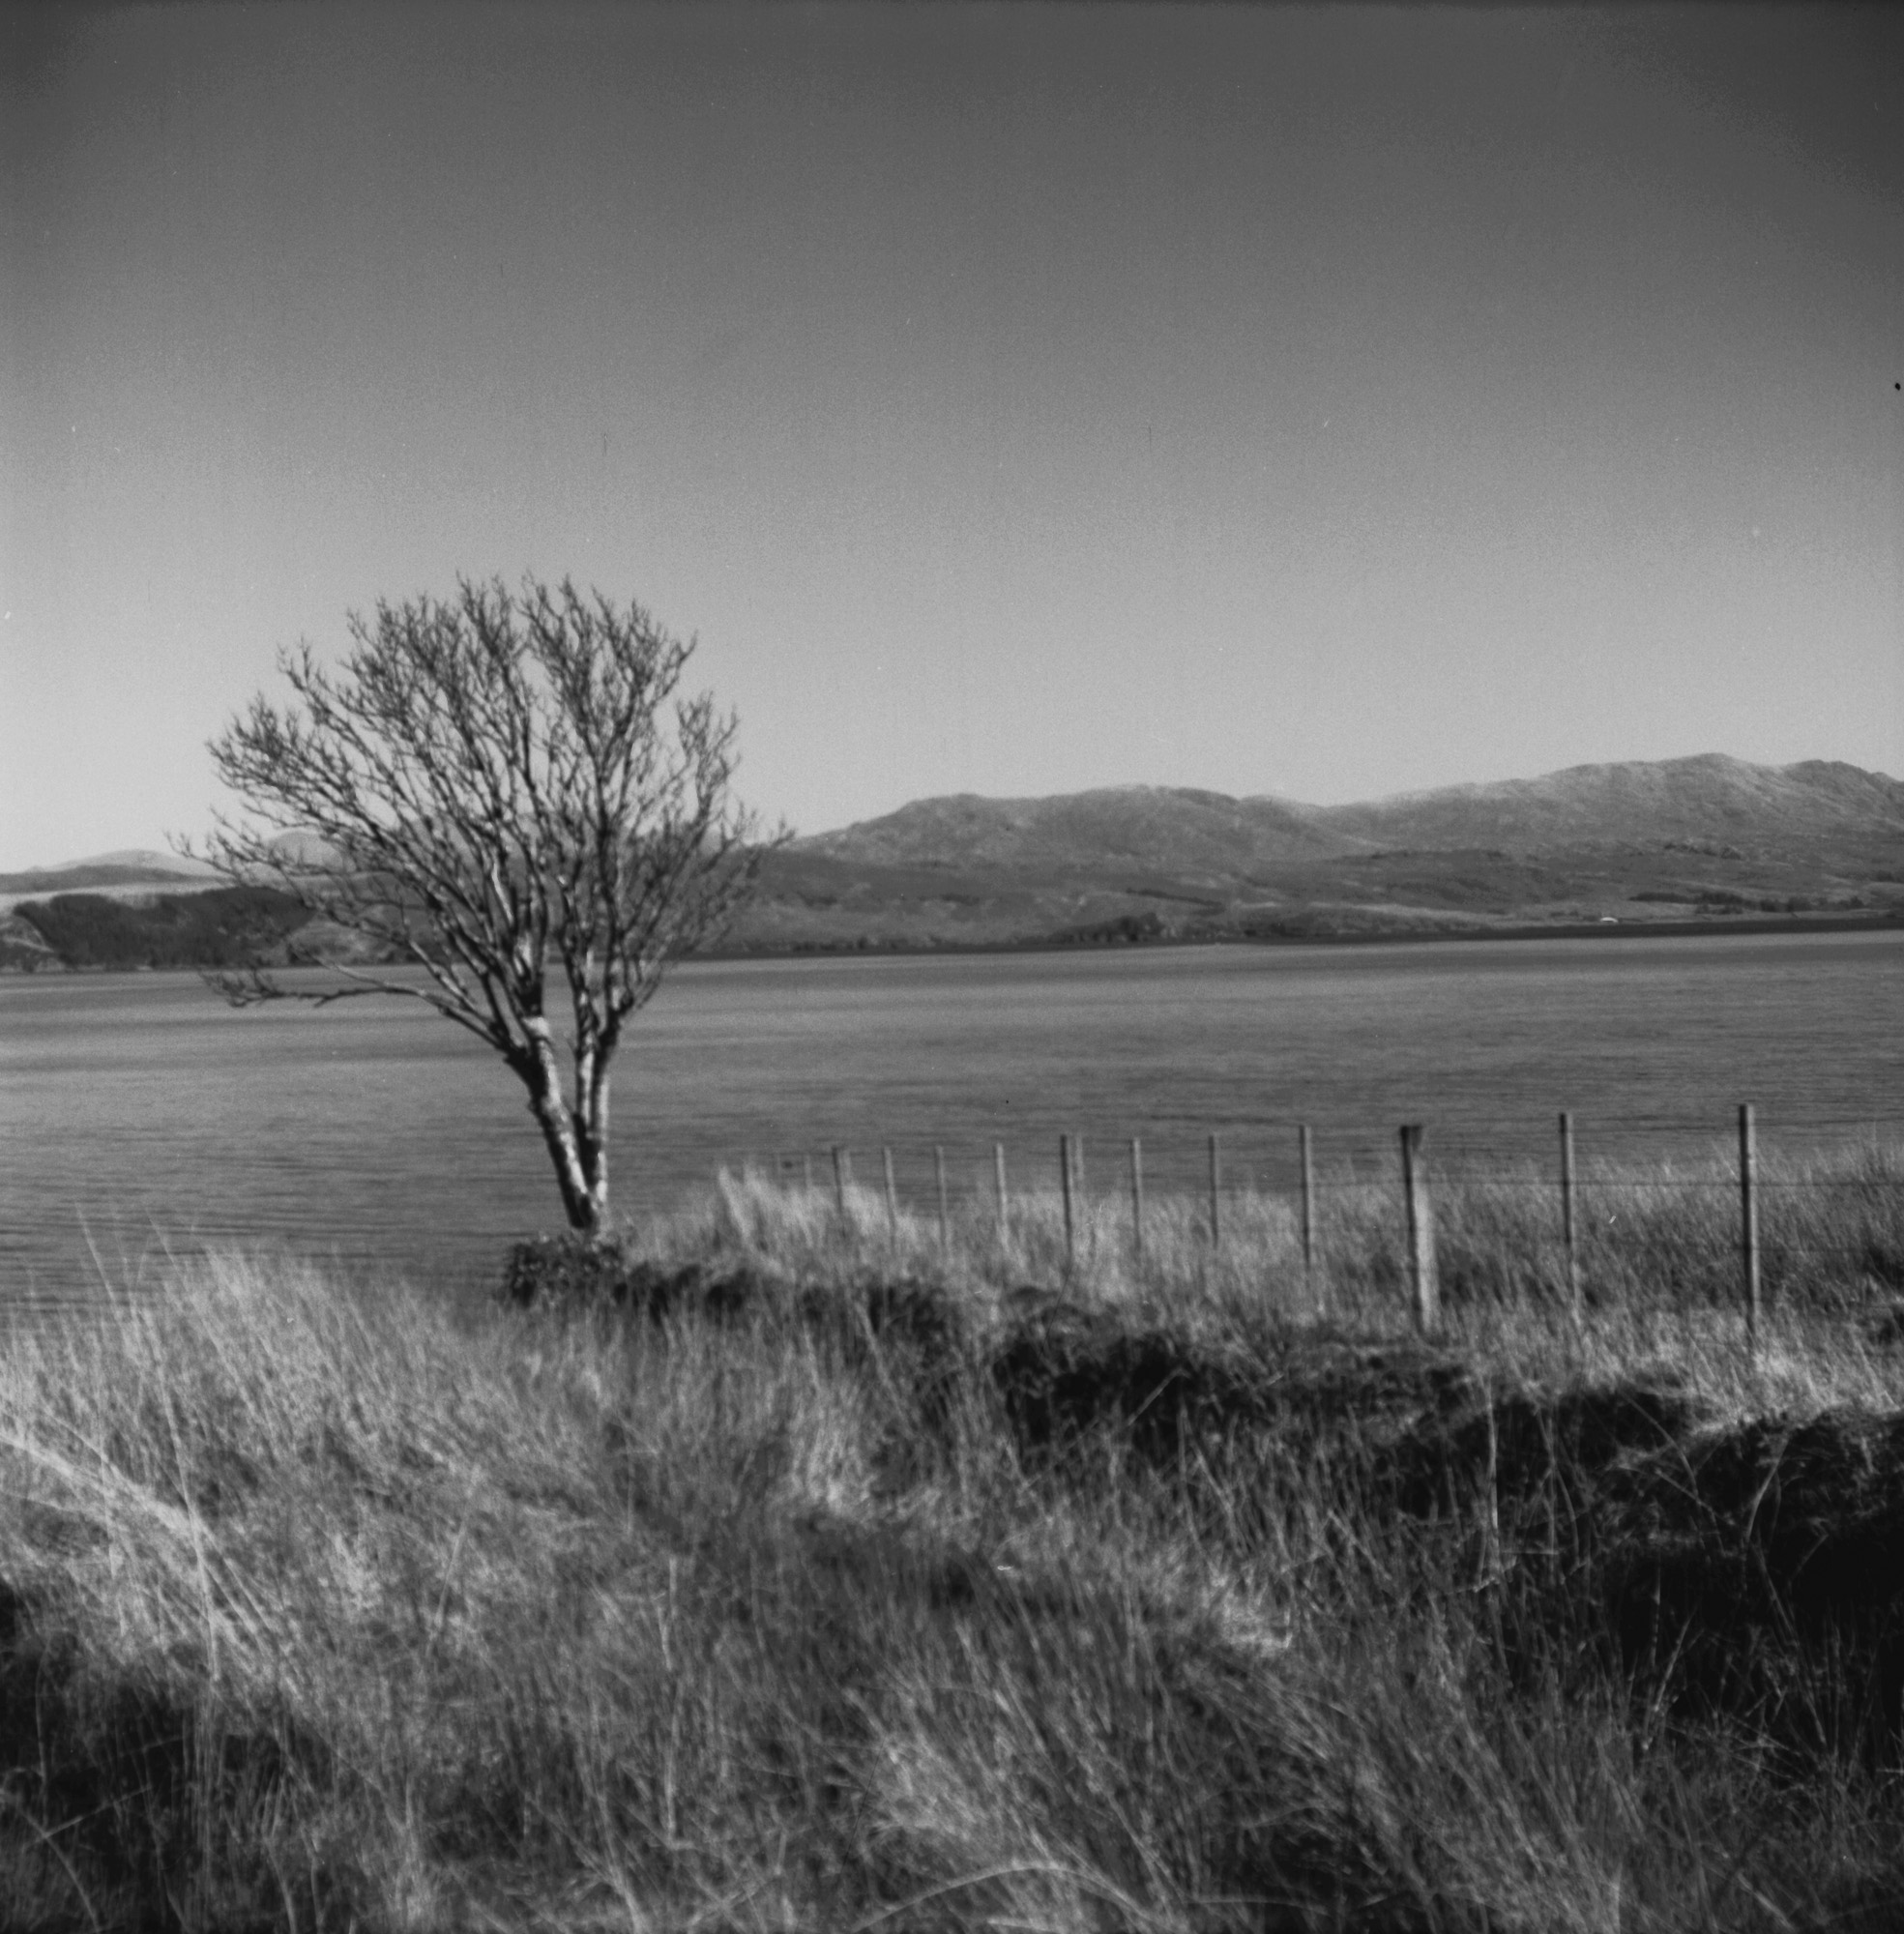
This will work with mountains, but your dog won't sit there perfectly still while you click the shutter release four times, so choose your subjects carefully. 

Ful-Vue settings:

ND8 @ 1/30 = 3 stops less

ND4 @ 1/30 = 2 stops less

ND2 @ 1/30 = 1 stop less

1 shot = 1/30 of a second

2 shots = 1/15 of a second (1 stop extra)

4 shots =1/8 of a second (2 stops extra)

8 shots - 1/4 of a second (3 stops extra)

A handy way to get the ND range is a small cheap variable ND filter, which will be plenty reliable at these low settings.

There we go, we can now get +/- 3 stops on a box camera with only 1 extra filter in the gear bag. You can take it further, but pressing the shutter 16 times will get tiresome and the good high stop ND filters are pricey.

Development

Both of the approaches outlined so far to either increase or reduce the amount of light entering the lens are approaches that can be done on location, in the moment, in camera. However, there is another approach that can also help keep you snapping away without worry that the pictures will be under- or overexposed. This approach takes place during development, back home, once all the pictures are taken. Or, if you don't develop your own film, a lab will do this for you. Just make sure they know your requirements.

The processes are called push, and pull developing. Basically, you compensate for the under- or overexposed images by toggling their development times. If your images were overexposed, you want to pull the film. If your images were underexposed, you want to push the film. 

It is highly important to note that this only works for the whole roll, not individual shots.

Pulling Film

I've discussed pulling film here before, but to pull film you need to reduce the development time by about 10% for every stop pulled. My husband has a neat calculator for this on his own website, which can help you determine the correct development times. If you are loaded with ISO 100 film, and decide a reduction of 1 stop to ISO 50 would better suit the lighting conditions, then you pull by 1 stop. If you are loaded with ISO 200 film, then you'd need to pull by 2 stops etc. 

What this means on the actual shoot is that you just take your pictures as normal (no neutral density filters) resulting in a roll of overexposed images. The shorter development time then compensates for this and should result in developed images that look correct and not overexposed. 

Pushing Film

We do this for the opposite scenario. For example, you are loaded with ISO 50 film and an increase of 1 stop to ISO 100 would better suit the lighting conditions. In this instance you push 1 stop. If you need ISO 200, you push 2 stops and so on. Predictably, when pushing, you want to increase the development times. Use Nicky's clever calculator to work out the necessary timings for your own film development.

Again, during the shoot, just take the pictures as normal. No taking multiple exposures. You will end up with a roll of underexposed images and the push processing should correct this. I've got a few posts on this blog where I experiment with this method using Catlabs X Film 80, which produced some good results. By pulling and pushing I was able to treat it anywhere from ISO 50 to 640 without any problems. 

Pros of this Method

1) Nice and flexible. You can basically load up your film, make a mental note of the EV at your shooting location, then work out which ISO would have been best suited to those lighting conditions and push/pull accordingly.

2) Less limiting. You can still shoot your camera even if the box speed of your film isn't ideal and still get good results.

Cons of this Method

1) All or nothing. You can't push/pull just a few frames. It affects the whole roll.

2) Not all films are created equal. You can push and pull some no bother. Others within reason, and others should be left well alone. You'll have a lot more wiggle room with black and white film than colour. Make sure you do your research first.

3) Just like with digital photos, if you toggle the ISO this way you increase the noise. The more stops you push, the more grainy the images. The more stops you pull the more contrast you lose.

Things to Consider

1) Is the roll already part shot with correctly exposed images? Then you probably don't want to shoot the rest of the roll with a view to push/pull processing. You'll ruin the first images.

2) Are the lighting conditions really changeable? Then you probably want to correct the exposures in camera with filters or multiple exposures, or you will get inconsistent results.

3) Do you know that the lighting will stay consistently too high or too low? Then correcting the exposures in development is the best option if the camera is loaded, or the film cupboard was sparse.

Some Results

Catlabs X Film 80 pushed to 640
Catlabs X Film 80 pulled to 50


Monday 15 March 2021

C. T. Goode's Railway Rambles


It isn't often one finds a photo book that featuring pictures taken exclusively with a box camera, but by chance I came upon these two volumes by C. T. Goode [Charles Tony Goode] and thought they were worth sharing. If you Google this name it will become clear that the author's real passion is railways as he published a number of books on the subject between the 70s and the 90s.

Volume 1, published in 1988, is called Railway Rambles with a Box Camera and in the short and entertaining intro Goode writes:

 As far as I am aware, I think that I should be the first photographer to admit to using a box camera to take and display pictures in a collection, as it would not be done to state that one had used such a simple device in a sophisticated world of 'f's, zoom lenses and apertures, a world where the more complicated things are, the better....

...Even then [just after the end of WWII], to produce the box on a platform, peer into the inefficient little view finder and produce a massive 'click' did occasionally cause a stir...

...I do use it from time to time [still[]...The looks on the faces of others when the box camera is produced 'on location' have to be witnessed to be believed. It is as if one has suddenly rolled up in a suit of medieval armour!

Well at least in 2021 you are less likely to cause a stir shooting a box camera in public as more often than not people don't realise the box is a camera.

Volume 1 shows some historic steam locomotives. It is not meant to exhibit the capabilities of the Brownie No. 2 camera being used. That said, Goode does mention a few of the challenges of taking this subject matter with a box camera in his intro. 

He points out that he generally needed sunny conditions, or if the light was dull, he would take the photo anything up to four times on the same frame to get the correct exposure. Sometimes he would tilt the camera to the desired angle on some pennies and take a long exposure. He was also limited to taking either stationary or slow moving trains due to the low shutter speed.


 Volume 2, published in 1989 shows photos taken not of trains but of sites and stations and is a nice additional collection of photos taken on a simple box camera dating from c.1931.

 It was very refreshing to find photo books featuring snapshots taken exclusively on a Brownie box camera. It is inspiring to see the camera used this way to make a project on a theme and has me wondering what I might be able to achieve with my own box cameras. It has been a long time since I've been shooting with mine (largely due to the travel restrictions imposed by lockdown due to the current Covid 19 pandemic), and I could really do with a project to look forward to when we are free to travel again. Next year marks the centenary of the Ensign Cupid, and it might be nice to produce a zine or similar project that showcases what this marvellous and quirky box camera can do.